Enhance Your New Truck with a Custom Shield Bedliner!

Shield Bedliner: Where Quality Meets Aesthetics

When Quality Matters, Shield Bedliner Is The ONLY Option!

At Color Boss Custom Auto Body, we take great pride in offering a bedliner application service that goes beyond the ordinary. We use Shield, a premium bedliner product manufactured in the USA by TCI Products Inc. of St. Louis, Missouri This remarkable product is setting new standards in the industry, outperforming competitors like U-POL's "Raptor" in several key aspects.

The Shield Advantage

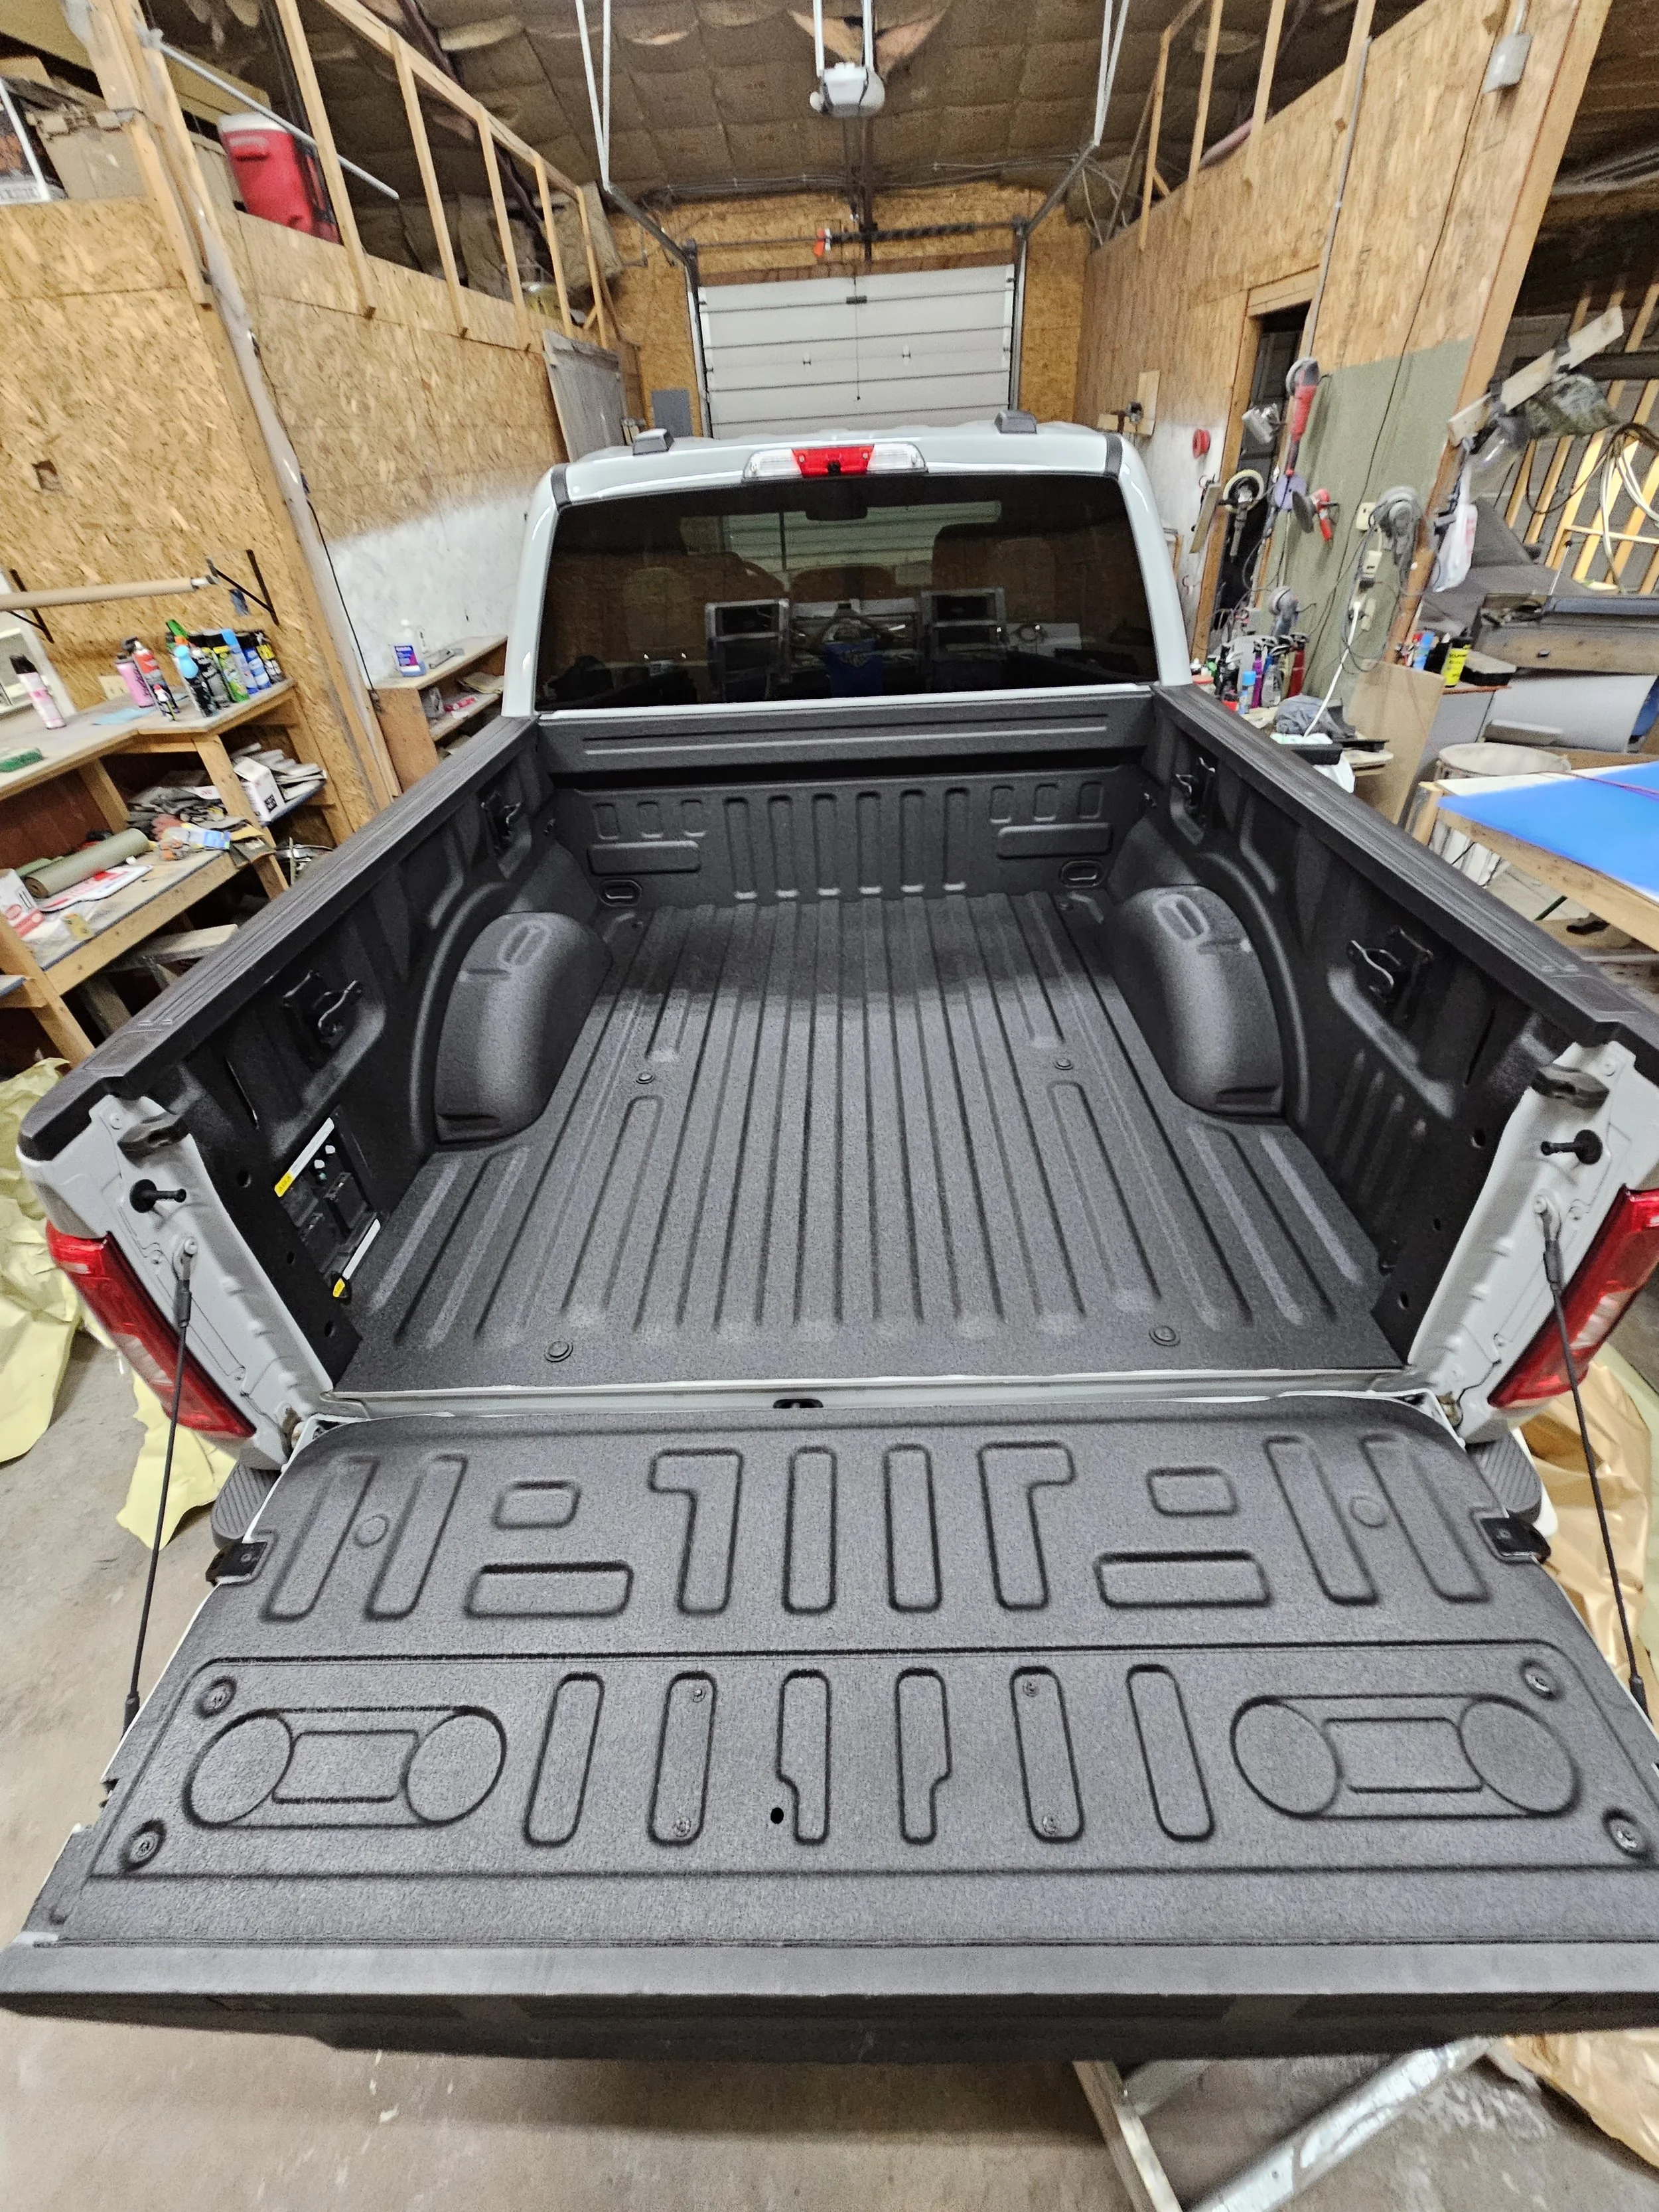
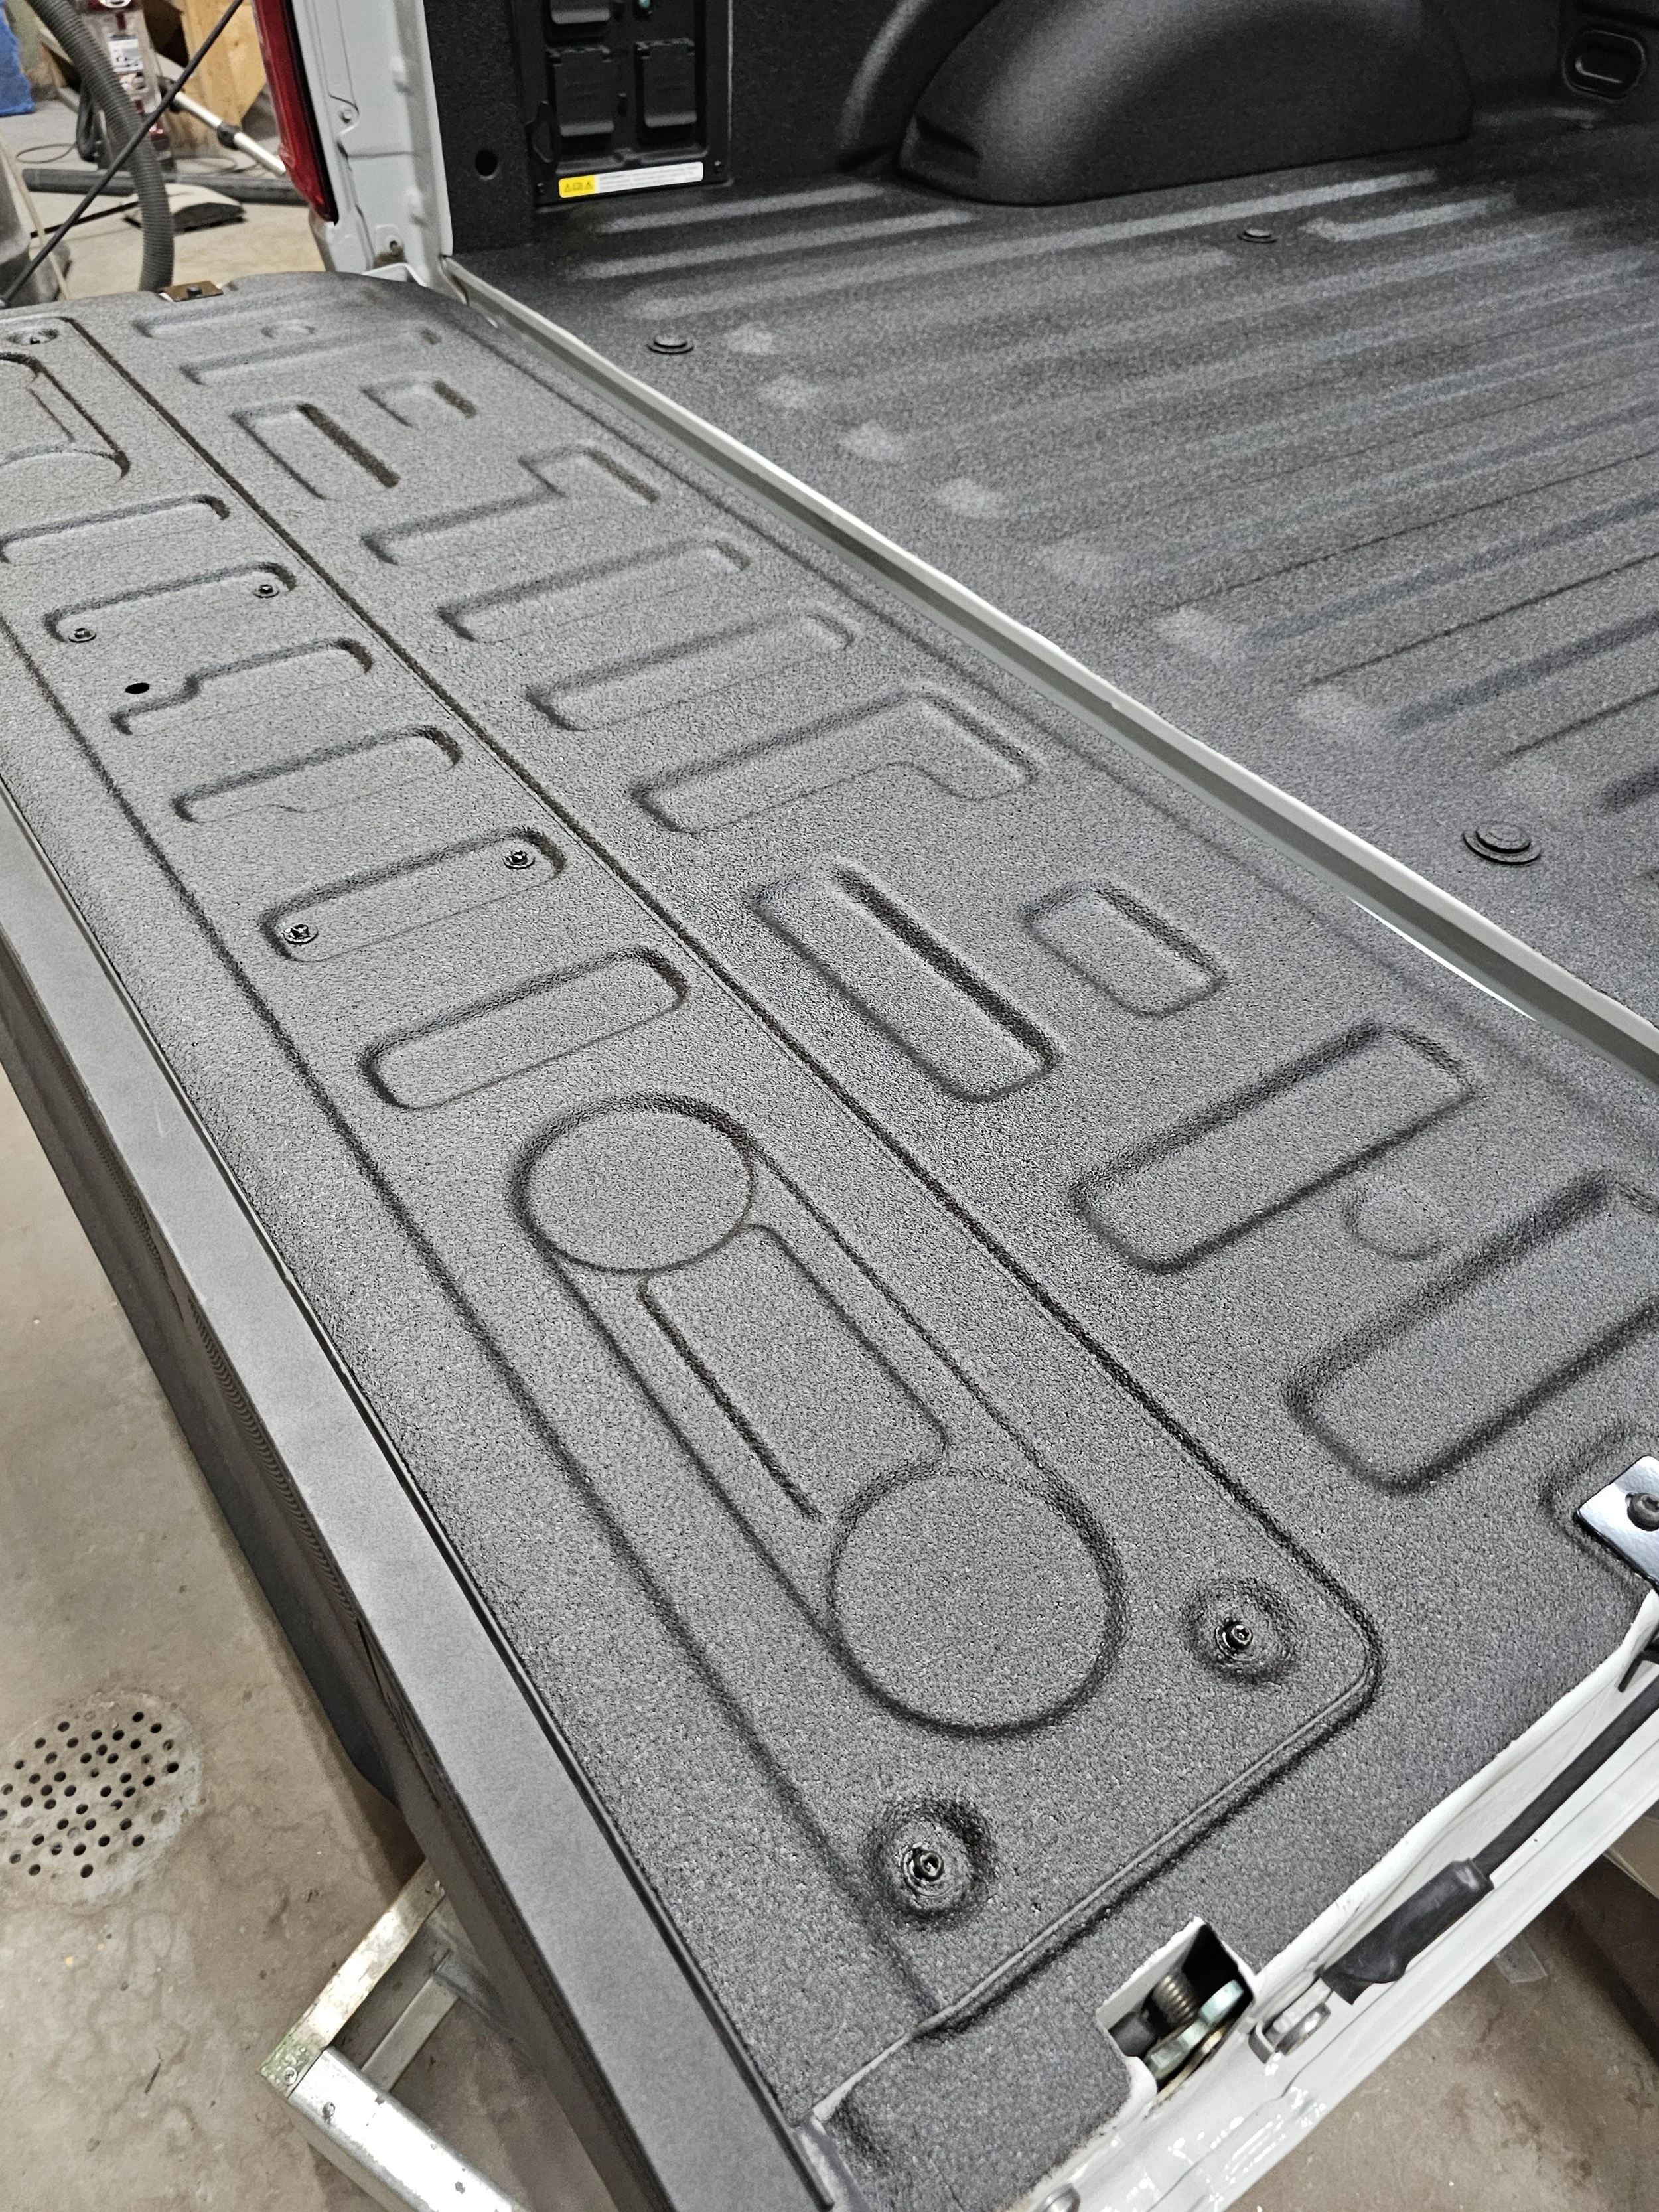
  1. Deeper, Darker Finish: Shield bedliner provides a stunningly deep, dark pebbly finish that sets it apart from the competition. When you choose Shield, you're choosing a bedliner that matches, or even surpasses, the quality of what any similar manufacturer provides. It's all about ensuring that your truck's bed doesn't just protect, but also impresses.

  2. Enhanced Durability: Our Shield bedliner is designed to withstand the test of time. It offers superior scratch resistance and exhibits 30% less shrinkage over the years when compared to U-POL Raptor bedliner. We understand that your new truck is an investment, and Shield helps protect that investment for the long haul.

  3. Thin Layer, Maximum Protection: Shield bedliner provides maximum protection against the elements while maintaining a remarkably thin layer. Unlike hot-mixed products like LineX and Rhino Liner, Shield offers exceptional durability without adding unnecessary bulk. It's the ideal choice for those who appreciate a sleek, factory-like finish that won’t get in the way of the inner-workings and functionality of your truck bed and tailgate.

The Art of Application

Here at Color Boss Custom Auto Body, we take pride in our work. We're not just technicians; we're car painting artists. Our custom auto painting expertise extends to spray applying Shield bedliner in a way that not only guarantees durability, but also aesthetically beautiful.

You can rest assured that your bedliner will be evenly applied with an absolutely stunning texture that rivals bedliners done at the manufacturing level. We understand that your truck is an extension of your style and personality, and our goal is to help you achieve a bedliner that complements your vision.

A Customized Experience

Your truck is a reflection of you, and we believe that your bedliner should be no different. Our Shield bedliner application service starts at $750, offering an exceptional value for a product that's a cut above the rest.

But that's just the beginning… we offer a range of customization options, including color matching, and can even extend our expertise to your rims, side mirrors, and exterior trim!

Conclusion

When you've invested $75,000 or more in a new truck, you deserve a bedliner that matches that value. Shield bedliner is your answer, combining quality, durability, and aesthetics in a single package. At Color Boss Custom Auto Body, we're here to bring your truck bed dreams to life. Let your imagination run wild, and we'll help turn it into a reality.

Contact us today to discover how you can enhance your new truck with our Shield bedliner application service. It's more than a bedliner; it's a work of art that ensures your truck is the envy of the road!

Carlton Flowers
Color Boss Custom Auto Body

https://www.facebook.com/colorbosscustomautobody

SPTA 6" Dustless DA Sander That Rivals Mirka! Full Product Review

An Electric Sander That Will End Your Use of Pneumatic Sanders!

SPTA 6" electric orbital sander

SPTA 6” Electric Orbital Sander

If you are an auto body technician or a DIY type, you’ll definitely want to read this review carefully!

I bought this SPTA 6” orbital sander and haven’t used my pneumatic sander ever since. I’d been eyeing the Mirka dustless sander for years, but at a cost of $229, I had to give this a try.

If you’re sick of the noise from your pneumatic sander, and your forearms are worn down from the constant vibration that damages your nerves, this is something you must consider.

My main goal was to find a sander that actually WORKS well, and rivals the best pneumatic sanders. That’s why I had been eyeing the Mirka Dustless sander for so many years. But I didn’t want to put down the $600 to get one.

But after years of using several brand-name pneumatic sanders, switching from one brand to another trying to find that special one that doesn’t sacrifice work ability while lowering the level of vibration, I finally took the plunge and decided to take a chance on the SPTA 6” dustless sander.

One other big reason that I was considering using an electric sander was the fact that I don’t want to continue cause my 80-gallon shop compressor to take the beating that it gets from constantly running air tools. I wanted to save my compressor’s longevity for when I really need it, for shooting paint. Plus I wanted to try an electric sander to cut down on the noise level from running the compressor.

If you don’t have a super-expensive shop compressor, this is an excellent option. My shop compressor is an 80-gallon 7.5HP Kobalt brand, which I purchased from my local Lowe’s hardware store. It gets the job done, but it’s not meant for regular body shop use for the long term. So I was super excited to get my hands on the SPTA 6” dustless sander.

At a price of $220, I couldn’t pass up taking the chance on trying it out. But when I received it and took it to my body shop for the first test use, I was absolutely astonished at how well this sander works.

First of all, the vibration is absolutely MINIMAL. What I’ve noticed when buying pneumatic sanders that advertise a lower vibration level is that they either don’t reduce the vibration enough to save my old forearms, or they would sacrifice actual work ability. That wasn’t the case with the SPTA electric sander.

On the first use, I was absolutely astonished at how smooth the action was, while working efficiently in removing old paint and smoothing body filler. I could hardly believe that this sander was performing so well while operating as smooth as butter. And the noise level is practically zero!

This sander has a great build, a long thick durable power cord, and comes with an exhaust hose for capturing dust. You can hook up the hose to a regular shop vac and reduce the amount of dust emitted, or you can run it with regular sand paper that doesn’t have exhaust holes, and it works just the same.

What I also really liked was the electric activation buttons that allow you to turn on or turn off the unit, plus set the maximum rotational speed while having the ability to adjust the speed on the fly with the activation lever.

The 5mm throw keeps vibration to a minimum, but is enough to put in the work to take down material fast. I’ve noticed that I’m able to feather out filler a lot easier, and control the amount of primer that is being sanded down better than what I could with my best pneumatic DA.

The unit is brushless, and maintenance-free. So it’s easy to use and maintain. There’s no need to spend the money on the Mirka brand when you’ve got this as an option. I give it a five-star recommendation for any body shop professional, or DYI garage enthusiast.

Give this sander a try if you’re looking for ways to save the pounding on your compressor, and save your forearms from damage over the years. You won’t be sorry. Click the link below or the product picture above to check this product out on my Amazon Associates page!

Carlton Flowers
Color Boss Custom Auto Body


DIY Pro Tip - Single Stage Paint vs 2-Part Paint Explained

Pros and Cons of Single State Versus Traditional 2-Stage Coatings

single stage vs 2 stage.jpg

For the “do-it-yourself” garage painter, you’ve got options on the type of coatings you choose to paint your car or truck. Depending on what your end goal is, there are several things you can consider which will help you to make the decision on which way you go. I’ll describe what I’ve learned from my experience on using both types, and this can help you narrow down your decision.

To begin with, the difference between single stage paint and 2-part paint is exactly how it sounds. Single stage coatings are meant to be sprayed on after putting your vehicle in primer, and when you finish, you’re done. There’s no need to apply a clear coat layer, because the base coat was made with ingredients that give it a glossy finish.

2-part paints separate the color from the clear coat, giving the vehicle a glassy finish that is much more visible than single stage paint. The base coat is applied after the primer stage, and it has a dull, matte look. It gives uniform color coverage. A separate clear coat is applied at the last step, which gives a translucent layer that can be finished to a higher shine.

For starters and DIY’ers, let’s talk about the advantages of single stage paint. The first is the most obvious, and that’s saving a chunk of time for your overall paint job. You can apply 2 good coats of single stage paint, and you’re done. That means a lot less time waiting in between coats for the paint to flash, which is normally 15 to 25 minutes.

Cost wise, you’ll save a bundle of money by finishing with the color coat. Adding a clear coat might cost you between $100 and $200 more, and you must have the skill to be able to lay on the clear coat in a way that it is uniform, and free of dust to give a nice finish. If you don’t have a professional paint booth, you’ll end up doing quite a bit of finish work on the clear coat, which involves wet sanding, buffing, and polishing. That’s an entire skill in and of itself.

For the more experienced folks like me, the single stage route loses my interest for a handful of reasons…

First, it’s hard to shoot. The last time I did a single stage metallic black paint job, I noticed right off the bat that the paint does not flow out of the gun and atomize like standard 2-stage base colors. It was frustrating. Second thing I noticed, it runs super easy. The consistency is not the same. That’s because it has the clear coat components built into the paint, which is much more prone to run.

When I completed the single stage metallic black on my friend’s 1993 Ford Ranger, I wasn’t satisfied. There were small areas that a dull look, because I didn’t have the gun at the proper distance away from the surface, and it laid on dry. I think that happened after I experienced a few runs, which prompted me to back off the surface a bit.

Single stage paint is very finicky. Shoot it too close, and you’ll run it. Shoot it too far back, and it lays on dry. You’ve got to have perfect control of the gun, and lay on the right amount of material to achieve a final gloss, avoid dry spots, and not run the paint. For me, it’s a waste of time, after considering how long it took me to wet sand out the runs in the first 2 coats and re-shoot those areas.

In comparison to 2-stage base colors, spraying single stage is really challenging. Spraying standard base colors to me is almost mindlessly simple and easy to control. You get better coverage, which means less variation in color plus a deep rich opaque covering. Spraying 2-stage paint means you’ve got to learn the skill of putting down the clear coat, but the trouble you go through with getting that single stage paint to end up looking glossy almost cancels out the advantage of it.

My recommendation is that beginners and DIY enthusiasts who want to maximize cost effectiveness and minimize the time needed to spray a car use single stage paints. But those of you who have a bit more skill, or have use of a paint booth, stick with the 2-stage paint and put on that protective layer of clear.

The last thing I would mention is durability and aesthetic longevity. The single stage paint is a great way to go if you’re not too concerned with look and you’re happy with a moderate shine. But you should consider the fact that the single stage finish coat is going to be directly exposed to sunlight and weathering, and it’s going to go dull in a short period of time. Spraying clear coat will extend the period of time that the car will keep that initial shine.

A bonus tip for the serious experimenters - if you’re totally dissatisfied with your dull single stage paint after you complete your home shop job, you can in fact shoot a clear coat over single stage paint and improve the shine. Just remember to properly prep the surface to ensure adhesion before you shoot the clear on.

What are your experiences with single stage and 2-stage paint? If you’ve got more pros and cons that you’d like to add or discuss along with mine, chime on in! Post your comments below and let’s talk about it!

Carlton Flowers
The Color Boss

UPDATE - Due to the high number of questions I have received about single stage paint, I have written a new article that focuses on that topic alone. Check it out here! —> What Is Single Stage Paint? Answers From The Body Shop Pro!

Looking for single stage paint for your auto project? Check out my recommended suppliers on Amazon.com and help support the Body Shop Tips page!

Hit the link below to browse the Amazon store for automotive paint supplies, or click the link to the product pics for ideas on where you can start.