How To Maximize Durability When Using Single Stage Paint

CAN SINGLE STAGE PAINT MATCH THE DURABILITY OF TWO STAGE PAINT JOBS?

Single stage automotive paint

As a body shop owner, one of the most common questions I get from DIY painters concerns single stage automotive paint. Personally, as a professional painter, I loathe single stage paint and avoid using it at all costs. But there are some advantages for the novice painter who doesn’t have access to a paint booth, or the know-how on applying two-stage paint.

But the question I often get is, how long will the single stage paint last, and is it durable enough to stand up to the elements?

From my experience, single stage automotive paint can last 5 to 7 years with proper care if it is applied correctly, and if your surface is prepared right prior to painting. I can’t stress enough how important it is to make sure that your car’s panels are properly sanded and prepped before painting. It can make the difference between a good looking rookie job, and a train wreck that leaves your car looking worse than it did before you started.

As far as durability is concerned, it’s less durable than clear coat paint, which can last 10 years or longer with proper care. Single stage paint is also more prone to fading and scratching. That’s because a clear coat has an added chemical activator that must be mixed in prior to painting, which makes it much stronger and scratch resistant.

However, single stage paint is much less expensive than using a base coat and clear coat paint combination, and can be easier to apply because you have just one step to the painting process. This can cut down on the overall time it takes to get the job done.

But there is one thing to consider with single stage paint… it’s a LOT harder to spray apply without causing runs. That’s because the clear component is actually mixed into the base color itself. Regular two stage automotive paint sprays on with a matt effect, and the shininess comes when you add the clear coat layer.

Clear coat is much more prone to running, if applied too heavily with a paint gun. Base coat paint is much more dense with pigments, and takes considerably less material to achieve “coverage”, which means it will achieve the full depth of color without as much paint.

Since single stage paint has the clear component mixed into the formula, it can take quite a bit more paint to achieve full coverage, especially when you are changing the color from the vehicle’s original paint.

The key to getting complete coverage with single stage paint without causing runs is to take your time. Don’t rush the project. Apply modest coats, allow proper “flash time” (the time it takes for the solvents to evaporate) in between coats, and apply three to four good coats to achieve final coverage.

Going back to my previous point, you will want to make sure that you wash the vehicle thoroughly before starting, get it sanded smoothly to at least a 400 grit paper, and use a grease & wax remover to clean the surface before applying the paint. Proper prep work will save you from a future paint failure, and it will enhance the finished look of the job.

Once the paint has properly dried and cured, you can apply a standard car wax with UV protection to extend the life of the paint. Keeping your vehicle washed when exposed to tree sap, dirt, and mud will also ensure that you get the most out of your new coating.

Good luck on your project, and check out the links below to single stage paints that I recommend for use!

Carlton Flowers

Color Boss Custom Auto Body


SPTA 6" Dustless DA Sander That Rivals Mirka! Full Product Review

An Electric Sander That Will End Your Use of Pneumatic Sanders!

SPTA 6" electric orbital sander

SPTA 6” Electric Orbital Sander

If you are an auto body technician or a DIY type, you’ll definitely want to read this review carefully!

I bought this SPTA 6” orbital sander and haven’t used my pneumatic sander ever since. I’d been eyeing the Mirka dustless sander for years, but at a cost of $229, I had to give this a try.

If you’re sick of the noise from your pneumatic sander, and your forearms are worn down from the constant vibration that damages your nerves, this is something you must consider.

My main goal was to find a sander that actually WORKS well, and rivals the best pneumatic sanders. That’s why I had been eyeing the Mirka Dustless sander for so many years. But I didn’t want to put down the $600 to get one.

But after years of using several brand-name pneumatic sanders, switching from one brand to another trying to find that special one that doesn’t sacrifice work ability while lowering the level of vibration, I finally took the plunge and decided to take a chance on the SPTA 6” dustless sander.

One other big reason that I was considering using an electric sander was the fact that I don’t want to continue cause my 80-gallon shop compressor to take the beating that it gets from constantly running air tools. I wanted to save my compressor’s longevity for when I really need it, for shooting paint. Plus I wanted to try an electric sander to cut down on the noise level from running the compressor.

If you don’t have a super-expensive shop compressor, this is an excellent option. My shop compressor is an 80-gallon 7.5HP Kobalt brand, which I purchased from my local Lowe’s hardware store. It gets the job done, but it’s not meant for regular body shop use for the long term. So I was super excited to get my hands on the SPTA 6” dustless sander.

At a price of $220, I couldn’t pass up taking the chance on trying it out. But when I received it and took it to my body shop for the first test use, I was absolutely astonished at how well this sander works.

First of all, the vibration is absolutely MINIMAL. What I’ve noticed when buying pneumatic sanders that advertise a lower vibration level is that they either don’t reduce the vibration enough to save my old forearms, or they would sacrifice actual work ability. That wasn’t the case with the SPTA electric sander.

On the first use, I was absolutely astonished at how smooth the action was, while working efficiently in removing old paint and smoothing body filler. I could hardly believe that this sander was performing so well while operating as smooth as butter. And the noise level is practically zero!

This sander has a great build, a long thick durable power cord, and comes with an exhaust hose for capturing dust. You can hook up the hose to a regular shop vac and reduce the amount of dust emitted, or you can run it with regular sand paper that doesn’t have exhaust holes, and it works just the same.

What I also really liked was the electric activation buttons that allow you to turn on or turn off the unit, plus set the maximum rotational speed while having the ability to adjust the speed on the fly with the activation lever.

The 5mm throw keeps vibration to a minimum, but is enough to put in the work to take down material fast. I’ve noticed that I’m able to feather out filler a lot easier, and control the amount of primer that is being sanded down better than what I could with my best pneumatic DA.

The unit is brushless, and maintenance-free. So it’s easy to use and maintain. There’s no need to spend the money on the Mirka brand when you’ve got this as an option. I give it a five-star recommendation for any body shop professional, or DYI garage enthusiast.

Give this sander a try if you’re looking for ways to save the pounding on your compressor, and save your forearms from damage over the years. You won’t be sorry. Click the link below or the product picture above to check this product out on my Amazon Associates page!

Carlton Flowers
Color Boss Custom Auto Body


Why Does It Cost So Much To Paint A Car? Answers From The Expert!

WHAT FACTORS IN TO THE COST OF REPAINTING A CAR!

the cost of painting a car

I’m often asked by people in my community what it costs to have a car repainted, or to have a complete color change. But the majority of the time, potential customers calling to inquire are left in shock when they are given a rough estimate on how much it costs to make their car look new again

These days, people have no earthly idea of the general cost of repainting a vehicle, and that’s because of a company that has been around since the 80’s that used to advertise the “Ambassador Paint Service Special” for $299.

That company is MAACO, and to this day, they still advertise the “Ambassador” service for as low as $499.

But what most people don’t realize is the fact that MAACO assumes that all of the necessary prep work will already be done on the vehicle in order to get the cheap $499 price. This also assumes that you won’t mind the single stage paint that will be used, which usually won’t survive the first trip to the car wash.

Thanks to the advertising blitz of the MAACO company for several decades, most people still think it is possible to have an entire car repainted for under $500. But this is very misleading. Once you include all of the necessary prep work that must be done, the cost of that MAACO paint job will be the same or higher than any other professional auto body shop, which is usually more than $7,000.

You might be gutsy enough to take on that prep work, but it will require turning your home’s garage into a smelly and dusty body shop. Plus, you might spend months and even years learning the skills you’ll need to get the job done right.

The cost for a complete refinish might come as a shock to those who don’t have any experience in auto body work, but there are several factors that can contribute to the cost of painting a car, including the following:

  1. Labor costs: Painting a car is a time-consuming process that requires a high level of skill and attention to detail. The labor costs associated with painting a car can be significant, particularly if the car requires extensive preparation or repair work before the paint is applied.

  2. Materials costs: The cost of the paint and other materials needed to paint a car can also be a significant factor in the overall cost. High-quality automotive paints and clear coats can be expensive, and the cost of these materials can vary depending on the type of paint used and the size of the car.

  3. Condition of the car: The condition of the car before painting can also affect the cost. If the car requires extensive repair work or preparation before the paint can be applied, this can add to the overall cost of the paint job.

  4. Complexity of the paint job: The complexity of the paint job can also affect the cost. For example, a simple paint job with a solid color may be less expensive than a more complex paint job with multiple colors or intricate designs.

In general, the cost of painting a car can vary significantly depending on the specific factors involved in each case. It is best to get estimates from multiple sources and consider the quality of the materials and workmanship when choosing a painter.

In order for a paint job to last for several years and stand up to the harsh elements, it’s best to consider a two stage paint job, rather than having the cheaper single stage paint applied. The cost is considerably higher, but it’s better to have a paint job that will last, rather than spending your hard earned money for a paint job that will get destroyed at the car wash.

One thing to consider is the value of your vehicle. If the cost of a complete paint job is more than what your car’s trade-in or private party value is, a repaint might not be your best bet. It might be better to ditch the car and buy something newer that suits your taste, unless it’s a classic car or something of sentimental value.

But there are some alternatives to having the car repainted. Most body shops and detail shops can provide a service called “paint correction”, where the original shine can be brought back to the car through wet sanding, buffing with a cutting compound, and polishing the vehicle. However, the condition of the clear coat has to be above a maximum of damage or oxidation in order for it to be restored.

My advice is to take your vehicle to your local auto body shop and let a professional give it a good look. A pro can normally determine within a matter of minutes if your car is in good enough shape for a paint correction, and this can cut the cost of that restoration quite considerably.

Lastly, if you want to learn more about the difference between single stage and two stage paint jobs, check out my previous article here, or leave a question in the comments!

Carlton Flowers

What Is Single Stage Paint? Answers From The Body Shop Pro!

Single Stage Auto Paint - What You Should Know Before Using It

I get a significant number of do-it-yourself people asking me, “what is single stage paint, and should I use this for my car to save money painting it myself?” That’s a loaded question that will take a lot of discussion to answer.

We’ll start with the basics of exactly what IS single stage automotive paint, and then we’ll get into the ramifications of a single stage paint DIY project. Let’s dig in!

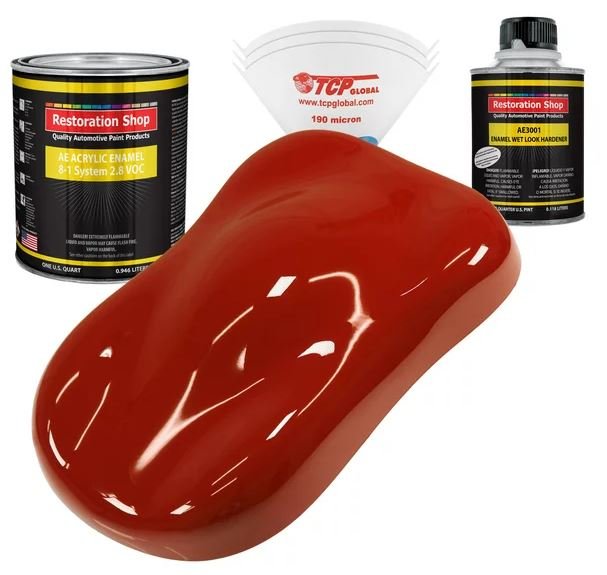
First off, single stage automotive paint is a type of paint coating that is exactly as it sounds… it’s a 1-step shiny paint that you can put on your car project. You can shoot the paint on in a single stage, as opposed to 2-stage paint, which requires you spraying a layer of base coat, and then a layer of clear coat.

When you spray on 2-stage base coat paint, it’s dull. It has a matte finish effect, because you’ve got to spray on the clear coat to bring out the shine and show off the pearls. Single stage paint is shiny right out of the gun. How do they do this? Easy. They mix in the clear coat right with the base color ingredients.

There are advantages and disadvantages to using single stage paint, and I know this from experience as a “DIY-painter-turned-into-body-shop-owner” professional. I won’t get all overly fancy on you like the other body shop professionals, because I can relate as an original DIY’er myself, and I can explain it in plain English terms.

Without making this post longer than it has to be, we are assuming that the vehicle is properly prepped and/or shot with primer before the single stage paint is applied. All of this information will be valid for the DIY’er, but also valuable for those who opt for having a body shop apply the paint.

Let’s cover all good & bad, and get you up to speed!

Advantages of Single Stage Paint

1) Cost - the biggest reason people consider using single stage paint. When you’re cutting out half of the necessary paint to finish the job, half the cost stays in your pocket.

Base coats and clear coats can get super expensive, ranging anywhere from a few hundred bucks to $1,000 for all of the components. However, most single stage paints can be purchased between $75 and $200 per gallon. 1 to 2 gallons is usually what is needed for a medium-sized vehicle.

2) Time of Application - it takes less than half the time to shoot single stage paint. Once you’ve got a car masked off and ready to shoot, you’ll only need to apply a couple of layers and you’re done.

2-stage paint requires laying down a couple of base coats allowing roughly 15 minutes to “flash” (that’s where the thinner, or “reducer” evaporates from the paint) in between coats, and then 2 to 3 layers of clear coat with an equal flash time in between. That’s more than double the time required for putting down a single stage paint job, thanks to the wait time for allowing each layer to “flash”.

3) Great for Small Projects - it’s the clear choice when you don’t want to “overdo” a project.

If you’re trying to paint one small panel on your beater car to make it look a little better and prevent it from rusting, single stage paint is a great choice. It’s also the better choice for painting panel covers on riding lawn mowers & other miscellaneous metal parts that you just don’t want to go overboard on.

It makes sense to consider the end-use of a project, and its overall value before investing money into the paint job. If your 1995 Ford Taurus that has one foot already in the graveyard needs a panel painted, you can have your local auto parts store mix a quart of single stage paint made to match the color of the car fairly accurately, and at a low price.

Disadvantages of Single State Paint

This is where it gets a little ugly. The reasons for not using single stage paint are more than likely going to steal the show for you. This will be eye-opening for you if you’re learning about this for the first time. Let’s get into the details!

1) The Durability Sucks - single stage paint does not have a good life span compared to 2-stage paint.

I don’t ever consider single stage paint as an option for a “nice” vehicle at my body shop. Durability is the #1 reason. You’re just not going to get the protection from the elements with single stage paint like you would with a 2-stage base coat/clear coat system.

Once you start to develop cracks, fissures, and oxidation in the paint, it’s a done deal. You have one layer to protect your car from what is underneath. Sure, you’ve probably got a layer of primer under the new paint, but once your paint layers fail, the primer won’t be enough to protect it from the damage it will get from the rain, sun, sleet, snow, and road salt.

The primary purpose of painting a car is to protect it from said damage due to the elements. Therefore, “more” is better. Sorry single stage, you lose big time on this point.

2) It Doesn’t Look Good - single stage paint cannot compete with 2-stage paint when it comes to creating that showroom shine.

As I mentioned before, the way they get single stage paint to lay down with a shiny gloss is by mixing in the clear coat into the base color components. What you’re getting is a “stained glass window” type of effect. Yes, the paint will be shiny… but you will have a noticeably duller finish than what you’d get with 2-stage paint.

Think of 2-stage paint like a big sheet of glass on a fine hardwood table that has been finish sanded and stained, compared to a hardwood table that doesn’t have a glass top, but has been shined and buffed with furniture polish. There’s just no comparison.

It is possible to wet sand, buff, and polish single stage paint to make it shine better. Some people get fantastic results. But sanding and polishing single stage paint reduces the thickness of the material’s coating on the vehicle. The thinner the coating, the less protection you have. Plus, it just would not make sense to spend the time and money doing finish work on cheap paint.

3) Exact Color Match is Difficult - you might not be able to match the exact hue on a newer vehicle.

If you’re a picky person and you’ve got a newer car that needs a panel repainted, you can forget single stage paint. Doing this yourself is not to be advised. It’s hard enough to match 2-stage paint to perfectly match existing paint on a car. It’s much worse with single stage.

The single stage paint will have less of the color pigments of its 2-stage counterpart. Plus, single state paint will not reflect the light in the same way, due to the clear coat being distributed throughout. That might not sound significant, but it will make a repaired panel stick out like a sore thumb.

Single stage paint is really only an option for a complete paint job if you don’t want to notice any glaring differences. But I would not advise doing a complete paint job in single stage paint for any of my customers. In fact, I wouldn’t even do it if someone requested it. They’d have to go down the road to Uncle Jed’s Paint Shed before I risked my reputation on such a project.

4) It’s VERY Difficult to Shoot - DIY people, pay close attention to this point!

Single stage paint is definitely NOT for the beginner. In fact, it’s hard for seasoned paint & body techs to shoot single stage paint without having problems. That’s why I highly recommend against its use for the do-it-yourself crowd.

When shooting 2-stage paint, putting on the base coat is the easiest paint you’ll ever spray. It’s as close to “fool-proof” as it can be. If you don’t lay it on too heavy, you’re not likely to get any runs or sags. All you have to do is shoot it per the manufacturer’s specifications and you won’t have any problems… most of the time.

Clear coat is a horse of a different color. It’s the hardest of paints to shoot. You can spray it on “dry”, which leaves a dull, grainy finish that doesn’t shine. You can lay it on too thick in spots, and get runs. And you can also put on too much overall, and get sags.

There are SO many minute details that have to be considered to get clear coat to lay on right. You’ve got to have the right temperature, moisture control, a good atomization out of the gun, proper pressure at the gun tip, the right distance from the surface, laying it on at the right speed, proper overlap, and more. Clear coat is very persnickety.

You might wonder why I bring this up as a point against single stage paint, because it sure sounds like a reason to use it. But do you remember what single stage paint is comprised of? Yes, base color with the clear coat mixed right in.

That means that each and every problem I just described regarding clear coat will be a problem you’ll have using single stage paint. It’s NOT beginner-friendly, and you can end up creating a real mess if your shoot goes wrong.

Conclusion

By now you can probably guess that I don’t recommend using single stage paint for the majority of applications. But if you’re really into painting, and have the patience to learn how to perfect the process, single stage paint can be your friend.

As I mentioned before, there are those who can apply single stage paint and achieve spectacular results when doing all of the required finish work. If you’re wanting to do a repair on a newer vehicle that you might resell in the future, get a professional body shop to apply a 2-stage paint job. But if you’re feeling froggy and want a challenge, single stage paint can work if you pay close attention to detail and apply it properly.

I highly recommend using a quality single stage paint from a trusted manufacturer. Hit the links below to view and purchase paints from the manufacturers that I have used in the past via Amazon, and in doing so, you’ll help to support the Carltonzone “Body Shop Tips” mini blog where you’ll be able to ask questions and get advice from the pros!

Carlton Flowers
Color Boss Custom Auto Body Shop


DIY Pro Tip - Single Stage Paint vs 2-Part Paint Explained

Pros and Cons of Single State Versus Traditional 2-Stage Coatings

single stage vs 2 stage.jpg

For the “do-it-yourself” garage painter, you’ve got options on the type of coatings you choose to paint your car or truck. Depending on what your end goal is, there are several things you can consider which will help you to make the decision on which way you go. I’ll describe what I’ve learned from my experience on using both types, and this can help you narrow down your decision.

To begin with, the difference between single stage paint and 2-part paint is exactly how it sounds. Single stage coatings are meant to be sprayed on after putting your vehicle in primer, and when you finish, you’re done. There’s no need to apply a clear coat layer, because the base coat was made with ingredients that give it a glossy finish.

2-part paints separate the color from the clear coat, giving the vehicle a glassy finish that is much more visible than single stage paint. The base coat is applied after the primer stage, and it has a dull, matte look. It gives uniform color coverage. A separate clear coat is applied at the last step, which gives a translucent layer that can be finished to a higher shine.

For starters and DIY’ers, let’s talk about the advantages of single stage paint. The first is the most obvious, and that’s saving a chunk of time for your overall paint job. You can apply 2 good coats of single stage paint, and you’re done. That means a lot less time waiting in between coats for the paint to flash, which is normally 15 to 25 minutes.

Cost wise, you’ll save a bundle of money by finishing with the color coat. Adding a clear coat might cost you between $100 and $200 more, and you must have the skill to be able to lay on the clear coat in a way that it is uniform, and free of dust to give a nice finish. If you don’t have a professional paint booth, you’ll end up doing quite a bit of finish work on the clear coat, which involves wet sanding, buffing, and polishing. That’s an entire skill in and of itself.

For the more experienced folks like me, the single stage route loses my interest for a handful of reasons…

First, it’s hard to shoot. The last time I did a single stage metallic black paint job, I noticed right off the bat that the paint does not flow out of the gun and atomize like standard 2-stage base colors. It was frustrating. Second thing I noticed, it runs super easy. The consistency is not the same. That’s because it has the clear coat components built into the paint, which is much more prone to run.

When I completed the single stage metallic black on my friend’s 1993 Ford Ranger, I wasn’t satisfied. There were small areas that a dull look, because I didn’t have the gun at the proper distance away from the surface, and it laid on dry. I think that happened after I experienced a few runs, which prompted me to back off the surface a bit.

Single stage paint is very finicky. Shoot it too close, and you’ll run it. Shoot it too far back, and it lays on dry. You’ve got to have perfect control of the gun, and lay on the right amount of material to achieve a final gloss, avoid dry spots, and not run the paint. For me, it’s a waste of time, after considering how long it took me to wet sand out the runs in the first 2 coats and re-shoot those areas.

In comparison to 2-stage base colors, spraying single stage is really challenging. Spraying standard base colors to me is almost mindlessly simple and easy to control. You get better coverage, which means less variation in color plus a deep rich opaque covering. Spraying 2-stage paint means you’ve got to learn the skill of putting down the clear coat, but the trouble you go through with getting that single stage paint to end up looking glossy almost cancels out the advantage of it.

My recommendation is that beginners and DIY enthusiasts who want to maximize cost effectiveness and minimize the time needed to spray a car use single stage paints. But those of you who have a bit more skill, or have use of a paint booth, stick with the 2-stage paint and put on that protective layer of clear.

The last thing I would mention is durability and aesthetic longevity. The single stage paint is a great way to go if you’re not too concerned with look and you’re happy with a moderate shine. But you should consider the fact that the single stage finish coat is going to be directly exposed to sunlight and weathering, and it’s going to go dull in a short period of time. Spraying clear coat will extend the period of time that the car will keep that initial shine.

A bonus tip for the serious experimenters - if you’re totally dissatisfied with your dull single stage paint after you complete your home shop job, you can in fact shoot a clear coat over single stage paint and improve the shine. Just remember to properly prep the surface to ensure adhesion before you shoot the clear on.

What are your experiences with single stage and 2-stage paint? If you’ve got more pros and cons that you’d like to add or discuss along with mine, chime on in! Post your comments below and let’s talk about it!

Carlton Flowers
The Color Boss

UPDATE - Due to the high number of questions I have received about single stage paint, I have written a new article that focuses on that topic alone. Check it out here! —> What Is Single Stage Paint? Answers From The Body Shop Pro!

Looking for single stage paint for your auto project? Check out my recommended suppliers on Amazon.com and help support the Body Shop Tips page!

Hit the link below to browse the Amazon store for automotive paint supplies, or click the link to the product pics for ideas on where you can start.